Wednesday, August 17, 2011

Broccoli & Cheese Souffle

Holy Moly Batman.  These are GOOD.  I found this recipe and I was planning on making them for Veronica.  They sounded good and all.  The minute we gave them to her she started INHALING them.  I made my husband try it.  Just because I wanted to try it and it was labeled as a baby food recipe on the site I found it on and well...I am picky.  He tried it and said it was good.  I gave it a shot and let me tell you this is SOOOO good.  True babies can eat it, but I bet you will eat them too!

Ingredients:
  •  1 cup of ricotta
  • 1 cup mozzarella
  • 1/8 cup parmesean cheese
  • 1 10 ounce package of frozen chopped broccoli (I used florets and chopped them up well) 
  • 2 eggs (or 4 egg yolks)
  • 1 teaspoon of pre-minced garlic (Best invention EVER)
  • 1/2 teaspoon pepper
  • 1/2 teaspoon of fresh rosemary, chopped
  • 1/2 teaspoon of fresh basil, chopped
Directions:
  1. Thaw and drain the broccoli.  Make sure to get as much water out as possible.  I put mine between paper towels and smooshed it.
  2.  Preheat oven to 350F and spray a muffin tin with nonstick spray.
  3. In a bowl beat the eggs until foamy.  My hand mixer has a whisk attachment.  I used that.  It fluffed them up nice and quick.  You can also push down and make sure you get the stuff on the bottom foamy as well.
  4. Add the cheeses, pepper, and herbs.  I gave the mixture a quick beat with the whisk attachment again to mix it all together.
  5. Fold the broccoli into the egg/cheese mixture until just combined.
  6. Divide evenly in the muffin tins.  Mine filled all 12 holes halfway.
  7. Bake 20-30 minutes.  The original recipe said 20-25minutes.  I changed this a bit so mine had to stay in longer.  Mine went for 28 minutes.  From about the 20 minute point I would just keep an eye on them.
  8. Serve warm.  But I best these would be just as yummy chilled!

mmhmhmhmmm...

Sunday, August 14, 2011

Fruit Oatmeal Bars

I just had to put the most important thing first.  The picture.  These are phenomenal.  

I had frozen strawberries and blueberries from earlier this year so I threw those in.  I am planning on making more this week.  I think this time around blackberries are in order.  I'll let you know how those turn out!  I am SO glad I found this recipe.  

I made these in two separate pans.  I had an 8x11 and a 9x5.  I had enough base, but not enough filling.  So I increased the filling. But honestly...can you ever have too much berry goodness?

Ingredients:
  • 1 cup rolled oats, divided*
  • 3/4 cup whole-wheat pastry flour (or run regular whole wheat flour through a sifter a couple of times)
  • 3/4 cup all-purpose flour
  • 1/2 cup sugar
  • 1/2 tsp. salt
  • 4 tbsp. cold unsalted butter, cut into small pieces
  • 1 large egg
  • 2 tbsp. canola oil
  • 1 tsp. vanilla
  • 1/4 tsp. almond extract
*3/4 cups oats for the base of the bars and 1/4 cup oats for the topping

Fruit Filling Ingredients:

  • 6 1/2 cups  blueberries, raspberries, cherries, blackberries, strawberries, fresh or frozen, divided*
  • 3/4 cup orange juice
  • 1 cup sugar
  • 1/4 cup and  2 tablespoons cornstarch
  • 1 cup orange segments
  • 1 1/2 tsp. grated orange zest
  • 1 tsp. vanilla
 *VERY versatile recipe.  Just choose what you want to use.  I did mine half blueberry and half strawberry

 Directions:
  1. Preheat oven to 400 degrees (F).
  2. Put the oats in a blender or food processor and run until finely ground. Transfer to a bowl and stir in both flours, sugar and salt.
  3. Add chunks of butter and use a pastry blender or you fingers to incorporate it into the flour mixture until crumbly.
  4. Whisk egg, oil, vanilla and almond extract in a small bowl. Pour into flour mixture and stir until it everything is combined. It will be crumbly.
  5. Transfer 1/2 cup of the mixture to a small bowl and stir in the remaining 1/4 cup rolled oats (or nuts or a combination of the two). Set aside for the topping.
  6. Line a 9×13″ or two 9×5″ pans with foil or parchment paper. Spray the lined pan with cooking spray. Spread the dough evenly in the pan and press firmly into the bottom to form a crust. Set aside.
  7. Combine 4 1/2 cups berries, orange juice, sugar and cornstarch in a large saucepan. Bring to a simmer over medium heat, stirring constantly until the mixture is very thick, 4 to 5 minutes. This could take up to 10 minutes if you started with frozen fruit.
  8. Stir in the remaining 2 cups of berries, oranges, orange zest and vanilla.
  9. Spread the fruit filling over the crust. Sprinkle the reserved topping over the filling.
  10. Bake the bars for 15 minutes. Reduce oven temperature to 350 degrees and bake until the crust and topping are lightly brown, 25 to 30 minutes.
  11. Let cool completely before cutting into bars, at least 1 1/2 hours.

12.  After cooling I removed the bars by lifting them out of the pan by the tinfoil.
       Then I placed them on a cutting board and cut these with a spatula. 
13.  Once cut I wrapped these individually in plastic wrap and stored in the refrigerator.

Enjoy!

Back to the Cutting Board

Tuesday, August 9, 2011

Salsa Chicken Slow Cooker Style!

Crazy crazy CRAZY easy recipe.  I saw different variations on a few different sites, so here is my variation!
Ingredients:
  • 1 pound boneless skinless chicken breasts
  • 1 can cream of chicken soup ( you could use mushroom.  I don't dig fungi.)
  • 1 cup salsa 
  • 1 can black beans, drained and rinsed
  • 1 package taco seasoning OR 2 tablespoons of homemade taco seasoning 
  • 1 cup sour cream 
  • cilantro (optional)
  • green onion (optional)
  • shredded cheese (optional)
Directions:
1.  In the slow cooker add the chicken, soup, salsa, beans, and taco seasoning.  Mix well
2.  Cook on high for 4 hours or low for 6 hours.
3.  If desired, remove chicken and shred.  Return to slow cooker.
4.  Mix in sour cream.
5.  Serve over rice and topped with your choice of toppings. 
Enjoy!

Crushed Oreo and Chocolate Chip Cookies

I love Oreos.  I love Chocolate Chip cookies.  I have seen around online Oreos baked into a chocolate chip cookie.  The idea of that turned me off a bit.  I didn't want to crunch a big cookie inside a cookie.  So I got to searching and found this recipe!  SO GOOD!


Ingredients:
  • 1 stick butter, softened
  • 6 Tbsp. sugar
  • 6 Tbsp. brown sugar
  • 1 egg
  • 1 tsp. vanilla extract
  • 1 and 1/4 cups flour
  • 1/2 tsp. baking soda
  • 1/2 tsp. salt
  • 11 Oreo cookies, broken/crushed
  • 1 cup chocolate chips (I used semi-sweet )
Directions:
1.  Put the cookies in a plastic bag, I divided them into two bags, and get a spoon.  

This is the fun part. Commence WHACKING!
2.  Once fully whacked, preheat the oven to 350F.  
3.  Cream butter and sugar in a large bowl until well combined.
4.  Add egg and vanilla to mixture and mix well.
5.  In a medium sized bowl add flour, baking soda, and salt.  Mix well with a whisk.
6.  Slowly add the dry ingredients to the wet ingredients.  I did this in about 3 parts.  Mix until combined.
7.  Stir in Oreos and chocolate chips until just combined.

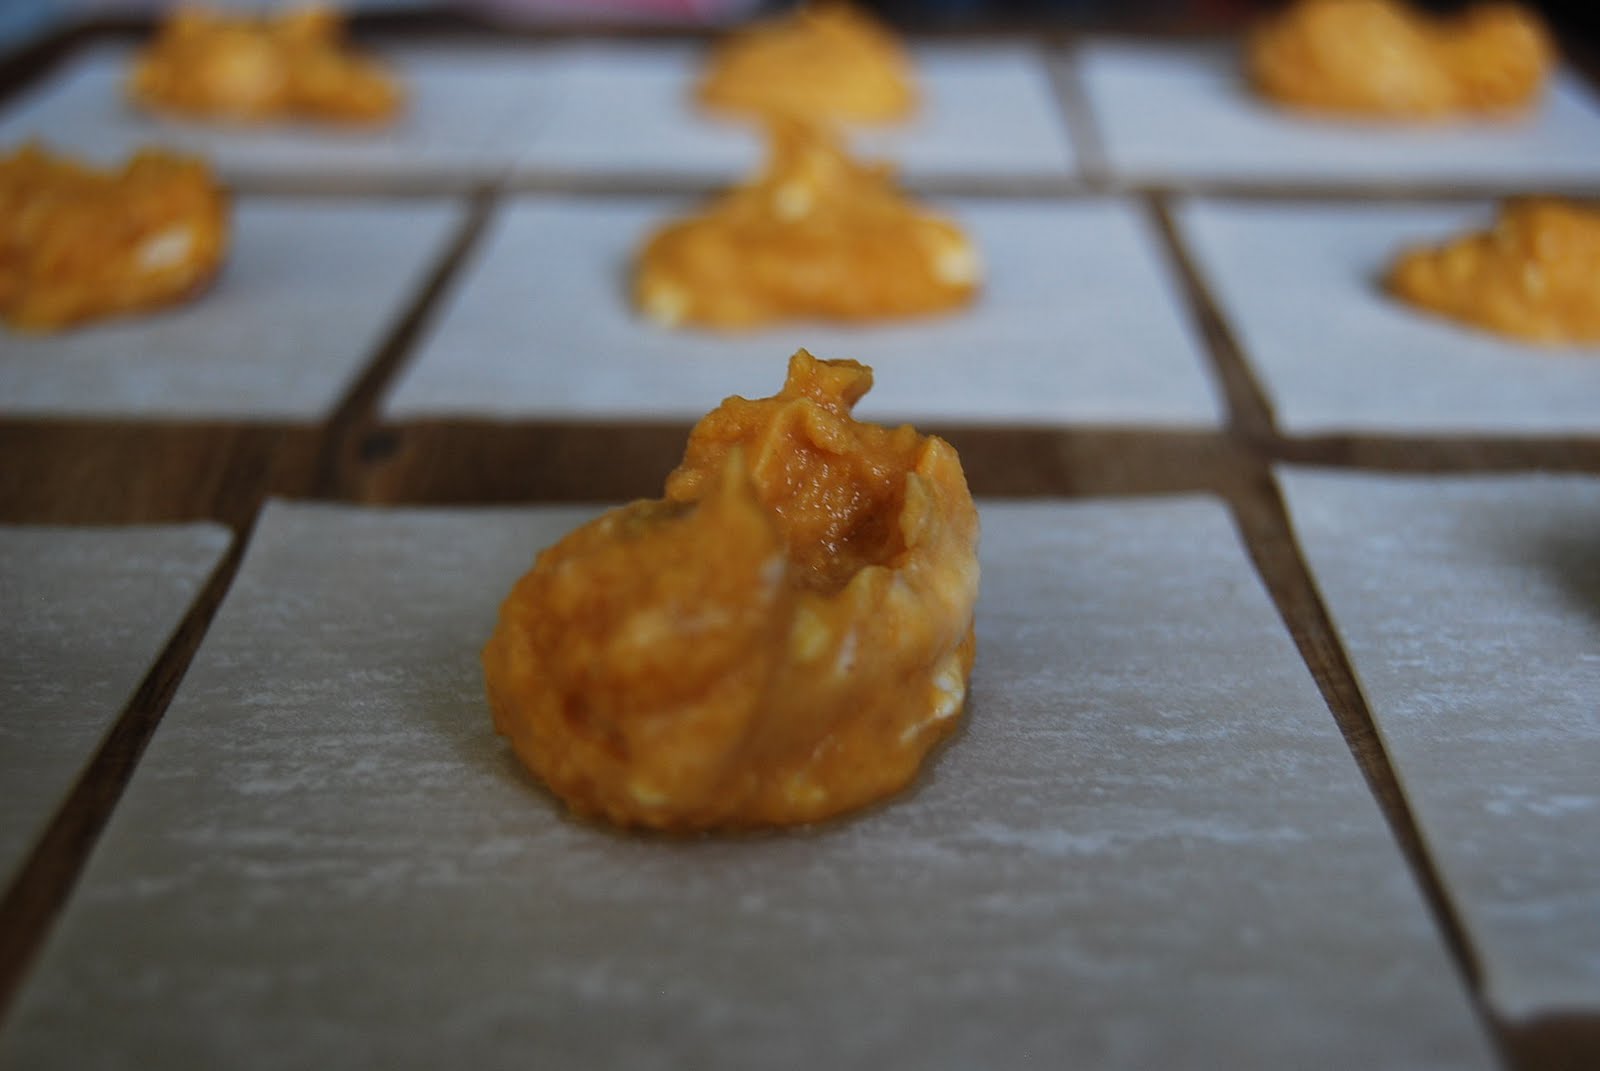
8.  Scoop cookies onto your cookie sheet.  I used my cookie scoop.  This is about
     a tablespoon size and the  greatest thing ever invented.  You get round cookies
     and uniform size which means uniform cooking time.  If you don't have one, you
     need one.

I got this one at Bed Bath and Beyond.
See how nice they look with the scoop?
9.  Bake for about 9 - 11 minutes.  You want them soft, but not too soft.
10.  Cool on the sheet for 2 minutes, then move them to a cooling rack.
ENJOY!!
Why yes, Nate is eating his off a wooden spoon dipped in his milk. Doesn't your 3 year old do this?


Sunday, August 7, 2011

Banana Bread

Cleaning the kitchen counters this morning I was excited to find out my bananas were super ripe.  First thought that went through my head was WOO HOO!  Banana bread time.

Being addicted to Pinterest, I decided to see if I could find any interesting recipes.  I found one, then I changed a whole bunch of things.  So I can say that this recipe is made, by me!  An original!  Woot!

Now, this bread is moister then most.  So it does not have the hard crunchy top, but fabulous. 

I love honey.  I think using it gives the bread an interesting flavor.  If you are not a honey fan, or don't have any, you can substitute 2/3 cup sugar in its place.  This will probably also help with the lack of crunchy top.  Also I am guessing this is why the bread has a darker color to it.  This is not burned in the least bit, but just darker then a normal loaf.

Ingredients:
1 1/3 cups unbleached all-purpose flour
1/2 teaspoon kosher salt
1/2 teaspoon baking soda
1/4 teaspoon baking powder
1/4 teaspoon ground cinnamon
1/4 teaspoon ground nutmeg
5 tablespoons unsalted butter, at room temperature
2 tablespoons sour cream
1/2 cup honey, I used clover honey
2 extra large eggs lightly beaten, at room temperature
1 1/2 cup mashed very ripe banana, 2-3 depending on size
1/2 teaspoon vanilla extract
1/2 teaspoon vinegar
 
Directions: 
  1. Preheat oven to 305*F.   Lightly spray an 8 1/2 x 4 1/2-inch loaf pan with baking spray.
  2. In one bowl mix the mashed bananas, sour cream, vanilla, and vinegar.  Set aside.
  3. In medium bowl whisk together the flour, salt, baking soda, baking powder, cinnamon, and nutmeg.  Set aside.
  4. In the bowl for a stand mixer beat together the butter and honey for about 2-3 minutes.
  5. Add in the flour mixture.  I added this in three batches so my kitchen did not get covered.  Mix until combined.
  6. Add the eggs and mix until fully combined.
  7. Using a spoon stir in the banana mixture until just combined.  Do not over mix.
  8. Pour into your prepared loaf pan.
  9. Bake for 50-60 minutes, or until a toothpick inserted in the center comes out clean.
Enjoy!

Saturday, August 6, 2011

Pumpkin Cream Cheese Ravioli in Sage and Butter Sauce

There are two things i love right now in the world.  This blog and Pinterest.  Why is this you ask?  Because of this blog I am being forced to expand my regular cooking routine and Pinterest is helping me do that.  I now base my meal planning around that.

Because of that, I found this wonderful recipe.  I did not really change anything other then the amount made.  Kinda perfect the way it was.
Ingredients:
  • 1 can of pumpkin puree (Make sure it is PURE pumpkin. NOT pie filling)
  • 4oz of cream cheese at room temperature
  • 1 teaspoon of cumin
  • salt and pepper to taste
  • Wonton wrappers
  • 4 tablespoons of butter
  • a few sage leaves
Directions:
  1. Mix together the pumpkin, cream cheese, cumin, salt, and pepper.
  2. Lay out your wonton wrappers.  Place a teaspoon amount in the center of each one.  Do not put too much in.  If  you do, it will squish out when you seal them.

     3.    Wet the edges with water.  I had a small glass with water and I dipped my
             finger in it and then just  ran  my finger around the edges.  You want it wet,
             but not drenched.
     4.  Fold the edges over and press to seal.  Make sure you get a tight seal
          to ensure the filling stays inside.


     5.  Repeat until all are filled.  I doubled the original recipe.  This recipe
          should use the whole pack of  wrappers.

   6.  At this point if you have more then you and your family can eat you can freeze
        them.  Place some flour on the bottom of a pan and place the raviolis onto the 
        flour.  Place in the freezer.  Once frozen you can transfer these to a freezer bag.
   7.  For the ones you will be eating now, place them in boiling salted water for 2 to 3 
        minutes.
   8.  Melt the butter in a pan with the sage.
   9.  Cook JUST until the butter browns.  You do not want it to burn.
  10.  Toss with the sauce and contemplate removing the others from the freezer to eat
          right now.
Enjoy!

Recipe from Closet Cooking

Tuesday, August 2, 2011

Slow Cooker Chicken Taco Soup

I know what you are thinking...SOUP?  It was 94 degrees today?!?  Are you crazy?
Yes.  Yes I am.
For this soup that is.  Someone I know posted it on a message board I frequent and I thought I would give it a try.  After checking over the recipe I noticed a few things I wanted to change and did.  :)  So...here is my version! WARNING!  I like spicy foods.  Feel free to reduce the taco seasoning! 

Ingredients:
  • 1 onion, chopped
  • 1 (16oz) can chili beans, undrained (mine was kidney beans with chili sauce-vegetarian)
  • 1 (15oz) can black beans, drained and rinsed
  • 1 (15 ounce) can whole kernel corn, drained
  • 1 (8 ounce) can tomato sauce
  • 12 ounces (1 1/2 cups) chicken broth
  • 2 (10 ounce) cans diced tomatoes with green chilies, undrained
  • 1/3 cup taco seasoning
  • 3 1/2 whole skinless, boneless chicken breasts
  • shredded cheese, optional
  • sour cream, optional
  • tortilla chips, optional
Directions:
  1. Add onion, chili beans, black beans, corn, tomato sauce, tomatoes, taco seasoning, and chicken broth to the slow cooker.   Stir well.
  2. Add the chicken breasts on top and push them down into the mixture until covered.
  3. Set slow cooker to low and cook for about 5 hours.
  4. Remove chicken breast and let them cool a bit.  Once cooled enough to handle, shred the breasts with two forks.  Then return the breasts to the slow cooker and stir.
  5. Cover and continue cooking for 2 more hours.
  6. Serve with shredded cheese, sour cream, and tortilla chips.