Showing posts with label dessert. Show all posts

Tuesday, August 13, 2013

Fresh Fig and White Peaches

When I was at the farmers market the other day they had some fantastic white peaches.  

The entire HUGE bag was only $5, so I snatched them up.  I ALSO noticed that my fig tree finally had some figs ready. 

This poor tree spent it's first two years of life in a pot on the back porch of our old house.  We knew we wanted to move, so I didn't want to plant it, but had to have it.  When we moved into the new house I planted it right away.  I can never move again! 
So this tree is about 6 years old and is finally giving me more than one or two at a time.

I absolutely adore figs and was trying to come up with a yummy quick recipe that I could eat for dessert that wouldn't kill the diet I am on.  I weighed out the figs and peach (minus the peach pit) and this dessert comes to 287 calories.  Not too bad considering how many calories you could easily scarf down with a bowl of ice cream!

Ingredients:
  •  74 grams of figs (about 5 or 6)
  • one white peach (about 170 grams)
  • 1 tablespoon UNSALTED butter (I like to control my salt intake.)
  • 1 tablespoon honey (there are many different types.  I used Orange blossom)
Directions:
  • Wash off all the fruit.
  • Cut the stems off the figs and slice the figs in half
  • Slice your peach in half.  These are white peaches.  The flesh is gorgeous!  Remove the pit and stem.  Then slice it into slices. 

  •  Mix the peaches and the figs together and head over to the stove!
  • At the stove you want to heat up a small pan and melt your honey and butter together.  I turn my gas stove to medium.
  • Once it is all melted together carefully pour in the peaches and figs.  You want your figs to be cut side down.  Same with the peaches.  

  • Let the peaches and figs cook for about 5 minutes.  You want to stir them a few times making sure the fruit doesn't get stuck to the bottom of the pan. 

  • Look how golden and gorgeous the peaches are getting!  Make sure to flip them to cook them evenly on both sides!
GAH!  I could lick the screen.
  • Pour into a bowl and eat!  Make sure to scrape up all the gooey syrup.  It MAY or may not form an awesome crunchy treat on the end of your spoon that I MAY or may not enjoy eating after all the fruit is gone.

Sunday, September 18, 2011

The BEST apple pie you will ever eat...seriously.

I go to the Farmers Market every Saturday.  I have a booth there.  There is a little old lady next to me named Selma.  Every week she talks to me about food.  Whether it is tomatoes, corn (her favorite), or lately apples.  This got me thinking about apple pie.

I like apple pie.  It is decent.  But it never really does it for me...until now.  This recipe I found is phenomenal.  Seriously.  The apples cooked to perfection and there was a caramel syrup you poured over....SO GOOD.  Not your traditional apple pie.  No seasonings involved.  AT ALL.  So if you want a pie, but your pantry is lacking, this recipe is for you.

 Ingredients:
  • A pack of refrigerated pie crust.  (I used Pillsbury sheets. If you are adventurous you can make your own crust.) 
  • 1/2 cup unsalted butter
  • 3 tablespoons all-purpose flour
  • 1/2 cup white sugar
  • 1/2 cup brown sugar
  • 1/4 cup water
  • 8 apples peeled, cored, and sliced (Pie quality.  I used Fuji.  I also adore Pink Ladies)
Directions:
  1. Place 1 crust in the bottom of your pie plate.  
  2. Spread your apples into the crust, mounding slightly.
  3. Top the apples with the second crust lattice style.  (I used pie crust cutters from Williams Sonoma and cut leaves out.  Basically you just want something to allow steam to escape and to let your caramel  seep into the pie.  )
4.  Melt butter in a sauce pan. Stir in flour to form a paste. Add white sugar, brown sugar 
    and water; bring to a boil. Reduce temperature, and simmer 5 minutes. 
5. Pour the caramel SLOWLY over the crust allowing it to drain down through the holes.

6. Bake at 425F for 15 minutes.  
7. Reduce heat to 350F and continued baking for 35-45 minutes.  You want it to be 
    browned and bubbly. Place tin foil around the edges of the pie, or use a crust shield to 
    prevent over browning.
Enjoy!


Saturday, September 3, 2011

Chocolate Mint Brownies (Tastes JUST like an Andies Mint)

I am rather addicted to Pinterest.  If you have never been there, you should.  Go now. Click the link, but come right back please!  I have managed to get one of my great friends addicted as well.  The other week she pinned some brownies with the note saying "I think you should make these and I will come over and help you eat them. :)"  So I decided to make them!

Some friends and I started a craft group called "The (Not So) Crappy Craft Club".  Feel free to check it out on Facebook.  Basically once a month we get together and do a cheap and easy craft.  I made these brownies for our first official meeting.  They were a big hit.  They taste JUST like an Andies mint.

Hope you like them! Please don't pay attention to the amount of butter.  It is WELL worth it.

Ingredients: 
Bottom layer:
  • 1 cup all-purpose flour (about 4 1/2 ounces)
  • 1/2 teaspoon salt
  • 1 cup granulated sugar
  • 4 large eggs, beaten
  • 1/4 cup butter, melted
  • 2 tablespoons water
  • 1 teaspoon vanilla extract
  • 1 (16-ounce) can chocolate syrup  (I used 2 cups of Hershey's Chocolate Syrup.)
Mint Layer: (My kids aren't fans of mint.  I think I will substitute Vanilla extract next time)
  • 2 cups powdered sugar 
  • 1/4 cup butter, melted
  • 2 tablespoons milk
  • 1/2 teaspoon peppermint extract 
  • 3 drops green food coloring
Glaze:
  • 3/4 cup semisweet chocolate chips 
  • 3 tablespoons butter
Directions: 

  1. Preheat oven to 350°. 
  2. To prepare bottom layer, lightly spoon flour into a dry measuring cup; level with a knife.  (Never EVER scoop out flour with the measuring cup.  You will pack too much flour into the cup and EVERYTHING you make will be very dense.)  
  3. Combine flour and salt; stir with a whisk. 
  4. Combine granulated sugar, 1/4 cup melted butter, 2 tablespoons water, vanilla, eggs, and chocolate syrup in a medium bowl; stir until smooth. 
  5. Add flour mixture to chocolate mixture, stirring until blended. BATTER WILL BE VERY THIN! 
  6. Pour batter into a 13 x 9–inch baking pan coated with cooking spray. 
  7. Bake at 350° for 23 minutes or until a wooden pick inserted in center comes out almost clean. 
  8. Cool completely in pan on a wire rack.
  9. To make the mint layer, combine powdered sugar, 1/4 cup melted butter, and next 3 ingredients (through food coloring) in a medium bowl.
  10. Beat with a mixer until smooth. 
  11. Spread mint mixture over cooled cake.  
  12. To prepare the glaze, combine the chocolate chips and 3 tablespoons butter in a medium microwave-safe bowl. 
  13. Microwave at HIGH 1 minute or until melted, stirring after 30 seconds. 
  14. Let stand 2 minutes. 
  15. Spread chocolate mixture evenly over top.  It doesn't look like a lot, but it will cover it.
  16. Cover and refrigerate until ready to serve. 
When you go to serve it I would run a knife around the edges so it will release easily.  I found the bottom brownie part slides out easily once the seal is broken from the top edge with the glaze.

Enjoy!


Original Recipe from Mel's Kitchen Cafe

Sunday, August 28, 2011

Healthy Pumpkin Pie Pudding

I LOVE pumpkin.  I do not think it needs to be a fall only food.   When I was pregnant with my last child I was diagnosed with Gestational Diabetes right around the fall.  It was a sad sad day.  All the fall foods were on the no no list.  I will make it up this fall and try to find some healthier versions!

This recipe is crazy easy and so good.   This will satisfy your need for pie and it only takes about 2 minutes to make!  Best part?  NO SUGAR ADDED.  Just happy healthy pumpkin and a few other ingredients.  If you wanted to, if you are anti fake sweetener, you could use the real stuff.  You will just have greater calories and more sugar.


Ingredients:

  • 1 large can of pumpkin or two 15oz ones (NOT pumpkin pie filling!!)
  • 1 box instant sugar free French vanilla pudding, small size (regular vanilla would work as well)
  • 1 tablespoon Pumpkin Pie seasoning
  • 1 tub of Sugar Free Cool Whip, thawed (takes about 4 hours.  Plan accordingly)
Directions:
  1. Mix all ingredients together.  All done!


Sunday, August 14, 2011

Fruit Oatmeal Bars

I just had to put the most important thing first.  The picture.  These are phenomenal.  

I had frozen strawberries and blueberries from earlier this year so I threw those in.  I am planning on making more this week.  I think this time around blackberries are in order.  I'll let you know how those turn out!  I am SO glad I found this recipe.  

I made these in two separate pans.  I had an 8x11 and a 9x5.  I had enough base, but not enough filling.  So I increased the filling. But honestly...can you ever have too much berry goodness?

Ingredients:
  • 1 cup rolled oats, divided*
  • 3/4 cup whole-wheat pastry flour (or run regular whole wheat flour through a sifter a couple of times)
  • 3/4 cup all-purpose flour
  • 1/2 cup sugar
  • 1/2 tsp. salt
  • 4 tbsp. cold unsalted butter, cut into small pieces
  • 1 large egg
  • 2 tbsp. canola oil
  • 1 tsp. vanilla
  • 1/4 tsp. almond extract
*3/4 cups oats for the base of the bars and 1/4 cup oats for the topping

Fruit Filling Ingredients:

  • 6 1/2 cups  blueberries, raspberries, cherries, blackberries, strawberries, fresh or frozen, divided*
  • 3/4 cup orange juice
  • 1 cup sugar
  • 1/4 cup and  2 tablespoons cornstarch
  • 1 cup orange segments
  • 1 1/2 tsp. grated orange zest
  • 1 tsp. vanilla
 *VERY versatile recipe.  Just choose what you want to use.  I did mine half blueberry and half strawberry

 Directions:
  1. Preheat oven to 400 degrees (F).
  2. Put the oats in a blender or food processor and run until finely ground. Transfer to a bowl and stir in both flours, sugar and salt.
  3. Add chunks of butter and use a pastry blender or you fingers to incorporate it into the flour mixture until crumbly.
  4. Whisk egg, oil, vanilla and almond extract in a small bowl. Pour into flour mixture and stir until it everything is combined. It will be crumbly.
  5. Transfer 1/2 cup of the mixture to a small bowl and stir in the remaining 1/4 cup rolled oats (or nuts or a combination of the two). Set aside for the topping.
  6. Line a 9×13″ or two 9×5″ pans with foil or parchment paper. Spray the lined pan with cooking spray. Spread the dough evenly in the pan and press firmly into the bottom to form a crust. Set aside.
  7. Combine 4 1/2 cups berries, orange juice, sugar and cornstarch in a large saucepan. Bring to a simmer over medium heat, stirring constantly until the mixture is very thick, 4 to 5 minutes. This could take up to 10 minutes if you started with frozen fruit.
  8. Stir in the remaining 2 cups of berries, oranges, orange zest and vanilla.
  9. Spread the fruit filling over the crust. Sprinkle the reserved topping over the filling.
  10. Bake the bars for 15 minutes. Reduce oven temperature to 350 degrees and bake until the crust and topping are lightly brown, 25 to 30 minutes.
  11. Let cool completely before cutting into bars, at least 1 1/2 hours.

12.  After cooling I removed the bars by lifting them out of the pan by the tinfoil.
       Then I placed them on a cutting board and cut these with a spatula. 
13.  Once cut I wrapped these individually in plastic wrap and stored in the refrigerator.

Enjoy!

Back to the Cutting Board

Tuesday, August 9, 2011

Crushed Oreo and Chocolate Chip Cookies

I love Oreos.  I love Chocolate Chip cookies.  I have seen around online Oreos baked into a chocolate chip cookie.  The idea of that turned me off a bit.  I didn't want to crunch a big cookie inside a cookie.  So I got to searching and found this recipe!  SO GOOD!


Ingredients:
  • 1 stick butter, softened
  • 6 Tbsp. sugar
  • 6 Tbsp. brown sugar
  • 1 egg
  • 1 tsp. vanilla extract
  • 1 and 1/4 cups flour
  • 1/2 tsp. baking soda
  • 1/2 tsp. salt
  • 11 Oreo cookies, broken/crushed
  • 1 cup chocolate chips (I used semi-sweet )
Directions:
1.  Put the cookies in a plastic bag, I divided them into two bags, and get a spoon.  

This is the fun part. Commence WHACKING!
2.  Once fully whacked, preheat the oven to 350F.  
3.  Cream butter and sugar in a large bowl until well combined.
4.  Add egg and vanilla to mixture and mix well.
5.  In a medium sized bowl add flour, baking soda, and salt.  Mix well with a whisk.
6.  Slowly add the dry ingredients to the wet ingredients.  I did this in about 3 parts.  Mix until combined.
7.  Stir in Oreos and chocolate chips until just combined.

8.  Scoop cookies onto your cookie sheet.  I used my cookie scoop.  This is about
     a tablespoon size and the  greatest thing ever invented.  You get round cookies
     and uniform size which means uniform cooking time.  If you don't have one, you
     need one.

I got this one at Bed Bath and Beyond.
See how nice they look with the scoop?
9.  Bake for about 9 - 11 minutes.  You want them soft, but not too soft.
10.  Cool on the sheet for 2 minutes, then move them to a cooling rack.
ENJOY!!
Why yes, Nate is eating his off a wooden spoon dipped in his milk. Doesn't your 3 year old do this?


Sunday, August 7, 2011

Banana Bread

Cleaning the kitchen counters this morning I was excited to find out my bananas were super ripe.  First thought that went through my head was WOO HOO!  Banana bread time.

Being addicted to Pinterest, I decided to see if I could find any interesting recipes.  I found one, then I changed a whole bunch of things.  So I can say that this recipe is made, by me!  An original!  Woot!

Now, this bread is moister then most.  So it does not have the hard crunchy top, but fabulous. 

I love honey.  I think using it gives the bread an interesting flavor.  If you are not a honey fan, or don't have any, you can substitute 2/3 cup sugar in its place.  This will probably also help with the lack of crunchy top.  Also I am guessing this is why the bread has a darker color to it.  This is not burned in the least bit, but just darker then a normal loaf.

Ingredients:
1 1/3 cups unbleached all-purpose flour
1/2 teaspoon kosher salt
1/2 teaspoon baking soda
1/4 teaspoon baking powder
1/4 teaspoon ground cinnamon
1/4 teaspoon ground nutmeg
5 tablespoons unsalted butter, at room temperature
2 tablespoons sour cream
1/2 cup honey, I used clover honey
2 extra large eggs lightly beaten, at room temperature
1 1/2 cup mashed very ripe banana, 2-3 depending on size
1/2 teaspoon vanilla extract
1/2 teaspoon vinegar
 
Directions: 
  1. Preheat oven to 305*F.   Lightly spray an 8 1/2 x 4 1/2-inch loaf pan with baking spray.
  2. In one bowl mix the mashed bananas, sour cream, vanilla, and vinegar.  Set aside.
  3. In medium bowl whisk together the flour, salt, baking soda, baking powder, cinnamon, and nutmeg.  Set aside.
  4. In the bowl for a stand mixer beat together the butter and honey for about 2-3 minutes.
  5. Add in the flour mixture.  I added this in three batches so my kitchen did not get covered.  Mix until combined.
  6. Add the eggs and mix until fully combined.
  7. Using a spoon stir in the banana mixture until just combined.  Do not over mix.
  8. Pour into your prepared loaf pan.
  9. Bake for 50-60 minutes, or until a toothpick inserted in the center comes out clean.
Enjoy!

Tuesday, July 26, 2011

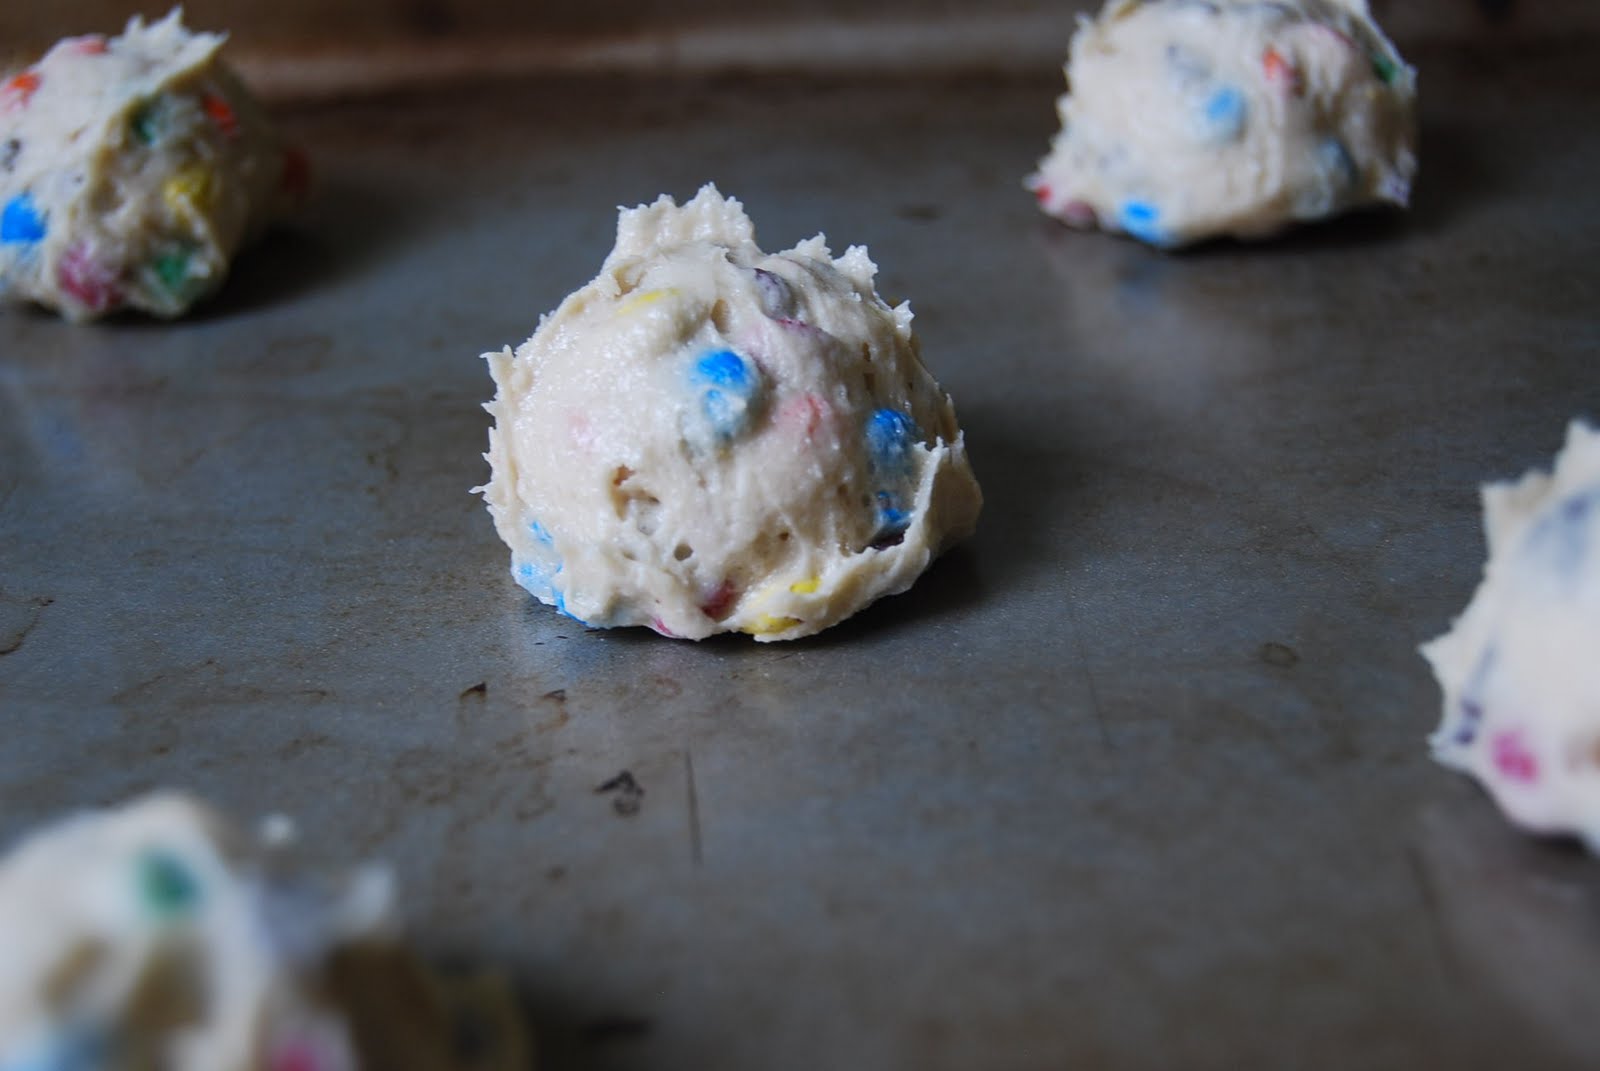
Chocolate Chip and M&M Cookies

If you are like me you have a bunch of half used bags of chocolate chips. 
I am on the mission to:
a) use up said chips
b) develop the best chocolate chip cookies ever.

This is my first attempt.
Ingredients:
  •  2 1/2 cups all-purpose flour
  • 1 teaspoon baking soda
  • 1/2 teaspoon salt
  • 1 cup (2 sticks) unsalted butter softened
  • 1 cup packed light brown sugar
  • 1/2 cup granulated sugar
  • 2 eggs
  • 1 tablespoon vanilla
  • 1 bag mini M&M's
  • 1 cup mixture of leftover chips (I used Ghirardelli semisweet chips and Tollhouse mini chips)

UNSALTED and farm fresh eggs.
My random bags.

Directions:
  1. Preheat oven to 350*F
  2. Stir together the flour, baking soda, and salt in a medium bowl.
  3. Beat the butter and two sugars together in a large bowl with an electric mixer at medium speed until light and fluffy.
  4. Add the flour mixture and beat until well blended. DO NOT add all at once unless you want a large mess to clean up.  I added mine in thirds.
  5. Stir in all your chips.


      6.  Drop by tablespoonfuls onto an ungreased cookie sheet.  If you don;t have one, I HIGHLY
           recommend you get a cookie scoop.  They make cookie making easy.  Your cookies are
           always the same size so they all cookie evenly!  I use the tablespoon size.
      7.  Bake for 8 to 10 minutes or until the edges are golden brown. 
      8.   Check on your cookie monsters:
NOT SO CLOSE!!!

     8.  Cool cookies on a cookie sheet  for 2 minutes.
   DO NOT skip the cooling part.  If you do, this can happen:
     9. Have a cookie and milk break and watch your three year old try to nibble all the M&Ms out.

Chocolate Chip Oat Bars


These are fabulous AND since it has oatmeal in it, you get to pretend it is healthy for you!  Score on two points!
 Ingredients:
1 cup all-purpose flour
1/2 teaspoon baking soda
1/2 teaspoon salt
1 cup packed light brown sugar
1/2 cup (1 stick) unsalted butter, softened
1 egg
1 tablespoon water
1 teaspoon vanilla
1 1/2 cups uncooked old-fashioned oats
1 cup semisweet chocolate chips (I used Ghirardelli)
Make sure you get your helpers!

Directions:
  1. Preheat oven to 375*F. Grease pan.  I used a 8"x11" glass baking dish.  A 9" square would work as well.
  2. Combine flour, baking soda, and salt in a small bowl.
  3. Beat sugar and butter in a large bowl with an electric mixer until creamy.
  4. To the sugar mixture add the egg, water, and vanilla.  Beat until well blended.
  5. Add the flour mixture and oats to the butter mixture.  Mix well with a spoon!  It is getting thick!
  6. With a spoon stir in 1/2 cup chocolate chips.  Spread dough into the baking dish and press down with a wooden spatula.  
  7. Sprinkle remaining chocolate chunks on top.
     8.  Bake for about 30 minutes.  You need to check and make sure the center is
            firm.  Mine took about 32 minutes.
     9.  Remove from oven and place on a wire rack to cool completely.

   10.  Serve with a LARGE glass of milk.

Friday, July 22, 2011

Soda Cake!

I have to admit.  I was VERY skeptical about this cake.  I still can not figure out how just two ingredients make this happen.   
Eggs?
Oil?

Nope.

Just a box of cake mix and a can of soda.  Weird, right?  But it turned out awesome!  It had the consistency of an angel food cake.  Light and fluffy and has that sticky quality to it.  I made mine with French Vanilla Cake mix and Diet Orange Crush soda.  I have heard that the key to this is use dark soda with dark cake (Coke with chocolate cake) or light soda with light colored cake.  Like mine!

Oh...so good no icing is needed!

Ingredients:
Box of cake mix
Can of soda

For mine I did French Vanilla and Diet Orange Crush.  Not sure if you HAVE to use diet, but helps with the amount of sugar!


Directions:
Pour soda into the cake mix and follow directions on the box without adding anything else.  All done. 

For mine:
Pour soda in the cake mix.

It was rather neat how bubbly/foamy it got.  The foam stayed until I mixed it.  Definitely cool part for the kiddos.

Mix 30 seconds on low speed, then mix 2 minutes on medium speed.
The blender being pulled out ALWAYS pulls him in.  Don't mind his hair.  We are getting it cut this weekend.  :)


Pour into cake pan, I did 9x13" glass pan (bottom sprayed with nonstick spray)
Give kids the beaters since there are no raw eggs in it.


Bake at 350F for 30-35 minutes.

My oven is typically warmer so I put it in for 28 minutes.  After checking with a toothpick it was still gooey, so I put it in for another 4 minutes.  Then is was done.

Remove from oven and cool.  No icing needed.  The pictures don't do it justice.  I couldn't get it out very easily since it is sort of sticky.  But it does taste fabulous!

Thanks Ashley for the idea and Becca for the flavor combination!

This combination tastes JUST like a Creamsicle.  YUM!

I would love to hear what combination you have tried!